
In the world of data management, dealing with duplicate entries is a common challenge that can lead to costly errors if not addressed properly. Learning how to remove duplicates in Excel is an essential skill for anyone who works with data, whether for personal projects or professional tasks.
How to Remove Duplicates in Excel
When it comes to managing data in Excel, dealing with duplicates can be a daunting task. Fortunately, there are several efficient methods to streamline this process.
Method 1: Remove duplicates with Conditional Formatting
To effectively highlight and identify duplicate values in Excel, the Conditional Formatting feature offers a straightforward method. By selecting your desired range of cells and navigating to Home > Conditional Formatting > Highlight Cells Rules > Duplicate Values, you can easily reveal duplicates.
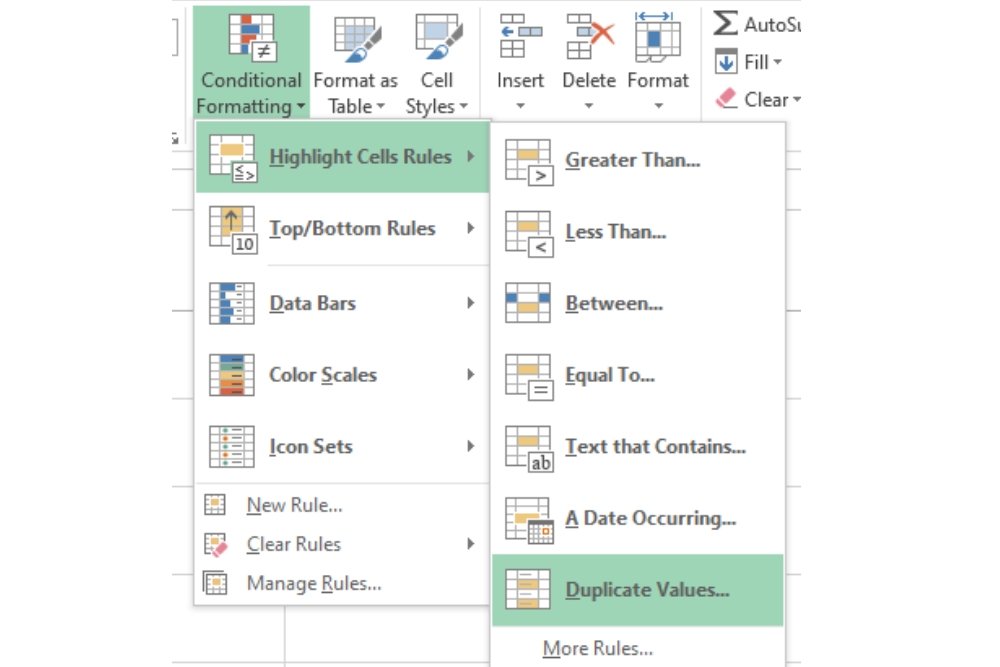
Once you choose an appealing format, such as Yellow Fill with Dark Yellow Text, the duplicates will stand out, allowing for quick assessment. This visual cue is not only helpful for immediate analysis but also encourages a more organized approach to data management.
Method 2: Use the Remove Duplicates feature
Another quick way to remove duplicates is to use the Remove Duplicates feature, a built-in Excel tool that cleans up your data by removing duplicates permanently. To use this method:
Start by selecting the range of cells you want to clean up; Excel will automatically recognize the relevant data. Navigate to the Data tab and locate the Data Tools section, where you’ll find the Remove Duplicates option waiting to transform your dataset.
When you click on this feature, a dialog box appears, allowing you to specify which columns to analyze for duplicates. If your dataset includes headers, don’t forget to check the “My data has headers” option. Once you hit OK, Excel springs into action, notifying you of how many duplicates were eliminated and how many unique entries remain.
This swift process not only enhances the clarity of your data but also empowers you to focus on what truly matters — making informed decisions based on accurate information.
Method 3: Remove duplicate values using the Advanced Filter option
The Advanced Filter option serves as a powerful tool that not only preserves your original data but also highlights unique entries. Start by selecting a range of cells or even a single cell; Excel will automatically detect the relevant data range for you.
Navigate to the Data tab, find the Sort & Filter section, and click on Advanced to open the dialog box.In this dialog, you can choose to copy unique values to a different location, which is particularly useful for maintaining your original dataset intact. Simply specify the desired output location in the “Copy to” field, check the “Unique records only” box, and hit OK.
Instantly, you’ll see all unique values neatly copied to your specified area, allowing for easy analysis or reporting without the clutter of duplicates.
Method 4: Remove duplicates with formulas
Start by merging the relevant columns — Name, Subject, and Grade — into a single cell to create a unique identifier for each entry. You have two options for this: utilize the CONCATENATE() function or the more straightforward & operator. For instance, using the & operator, you would write: `=A2 & B2 & C2`.
Alternatively, the CONCATENATE() function can be employed as follows: `=CONCATENATE(A2, B2, C2)`. Either method will yield the same result, allowing you to efficiently create a concatenated string that represents each record.
Once you’ve combined your data into one column, the next step is to determine how many times each unique value appears. This is where the COUNTIF() function comes into play. By entering `=COUNTIF(D2:D18, D2)` in a new column, you can count occurrences of each concatenated value from your previous step.
A result of 1 indicates that the entry is unique, while higher counts signal duplicates. This method not only helps in identifying duplicates but also enhances your understanding of data distribution within your dataset.
Method 5: Remove duplicates using Power Query
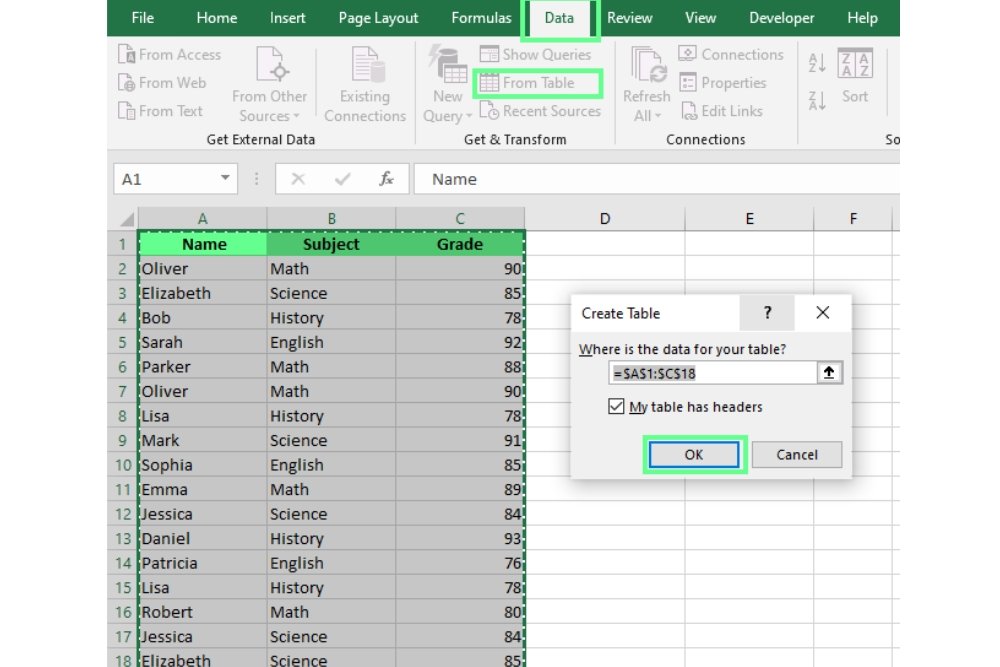
Using Power Query to remove duplicates in Excel is a powerful way to streamline your data cleaning process. Start by selecting a cell or range of cells, then navigate to the Data tab and find the Get & Transform Data section. Click on “From Table/Range” to open a dialog box that automatically selects your data range. Once you hit OK, the Power Query editor will launch, providing a user-friendly interface for managing your data.
In the Power Query editor, you can easily eliminate duplicates by choosing the “Remove Duplicates” option. You have the flexibility to target specific columns or apply changes to the entire table — simply click the top left corner button for a full table clean-up or right-click on individual headers for more tailored adjustments. After you’ve made your selections, don’t forget to click “Close & Load” at the top left corner to bring your refined data back into Excel.
Methods to Remove Duplicates in Excel: Which One’s The Best?
When discussing how to remove duplicates in Excel, it’s crucial to recognize that duplicate data can manifest in two distinct ways: duplicate values and duplicate rows. Duplicate values refer to repeated entries within a single column. For instance, if you have a list of names where “Minny” appears more than once, those instances are classified as duplicate values. On the other hand, duplicate rows occur when entire rows of data are identical across multiple entries, which can lead to inflated datasets and skewed analyses. If you’re also working in Word, you might find it helpful to learn How To Remove Section Breaks in Word for cleaner document formatting.
Best Practices for Duplicate Removal
Here are a couple of best practices I recommend when starting any data cleanup project:
- Maintain a Backup: Always keep an untouched backup of your raw data before initiating any cleanup efforts. This original version serves as a crucial reference point, ensuring that you can revert to the unaltered dataset if needed.
- Define Duplicates Clearly: Establish precise criteria for what constitutes a duplicate in your specific context. Remember, duplicates aren’t always straightforward; they may involve variations in spelling, formatting, or even partial matches across different fields.
- Standardize Data First: Prior to detecting duplicates, clean and standardize your data. This includes normalizing text case, trimming extra spaces, correcting date formats, and addressing special characters. A clean dataset enhances the accuracy of your duplicate detection process.
- Start with Simple Matching: Initially focus on exact matches before progressing to more complex matching algorithms. This step-by-step approach allows for easier identification of obvious duplicates and sets a strong foundation for refining your methods.
- Validate Your Results: After identifying potential duplicates, take the time to validate your results. Cross-reference with original data to ensure that you are accurately removing duplicates without losing valuable information. This validation step is key in maintaining data integrity.
Conclusion
Mastering the techniques on how to remove duplicates in Excel can significantly enhance your data management skills. By utilizing features such as the “Remove Duplicates” tool and conditional formatting, you can ensure that your datasets remain clean and accurate.
This not only saves time but also improves the overall quality of your analysis. Remember, maintaining a duplicate-free spreadsheet is essential for making informed decisions based on reliable data. So, take the time to apply these methods and streamline your workflow today!
FAQs
How can I identify duplicates in my Excel spreadsheet?
You can identify duplicates by selecting the range of data, going to the “Data” tab, and clicking on “Conditional Formatting.” Choose “Highlight Cells Rules” and then “Duplicate Values” to highlight them.
What is the easiest way to remove duplicates in Excel?
The easiest way is to select your data range, go to the “Data” tab, and click on “Remove Duplicates.” Follow the prompts to choose which columns to check for duplicates.
Will removing duplicates affect my original data?
Yes, removing duplicates will permanently delete duplicate entries from your original dataset. It’s recommended to create a backup of your data before proceeding.